Home » 2021 (Page 3)
Yearly Archives: 2021
Leaf Luminaries & Choosing Simplicity
It hits me every year, the last week of October. I begin to feel the expectations building, the stress of content creation, the subtle nudge to please all the people around me, and the pressure to make it look effortless. So a few years ago I made a promise to myself that I wouldn’t sacrifice my physical and emotional health during the holidays even if that meant saying “no” a lot more. I chose instead to simplify the season.
I stopped throwing a Christmas party and sending holiday cards. I make the living room festive and I hang garland on the stairs but I no longer decorate the entire house. I wait until December to buy a Christmas tree and decorate it with my kids. Once I took the pressure off myself the immediate result was I began to feel more joy during the holiday season.
I watch the stories of people I follow on Instagram and already there’s so much creativity happening. I love it, it’s beautiful, and I look forward to being inspired by more. I still like to make things and if they turn out well, I share them here on the blog.
But one thing I’ve realized as the years go by and in all the holiday seasons I’ve celebrated is that time is the only thing with real value and our energy is finite. We get to choose where we spend it.
So instead of stressing myself out during the holiday season, I opt for simplicity in decorating and entertaining. Right now that looks like leaves clipped from the backyard paired with luminaries made of leaves and wax paper.

To me, simplicity is a choice to not get caught up in what everyone else is (or seems to be) doing.
To you maybe that looks like decorating with swags of popcorn or construction paper garlands made by your kids or grandkids instead of store bought gilded versions.
Perhaps it’s the pie you buy from the bakery to bring to a party because you don’t have time to bake.
Maybe it’s prioritizing kicking your feet up and snuggling with your favorite people with just a string of twinkle lights for the mood, instead of hauling out bins of holiday decor and decking the halls for days only to have to put it away a few weeks later.
Whatever it looks like to you I guarantee, choosing simplicity means a less stressful and more joyful holiday season.
_______
If you’re interested in how to make these simple leaf luminaries with wax paper, I posted the supplies and instructions on Instagram Reels today. This fall craft is a return to basics – decoupage leaves as a simple centerpiece. (Just be sure to use flameless candles). I used the leftover skeleton leaves from these embellished pumpkins.


Today’s post is really just a word of encouragement and a reminder this holiday season there’s no need to stress out when decorating or entertaining. You can choose simplicity in all you do and still create seasonal beauty.
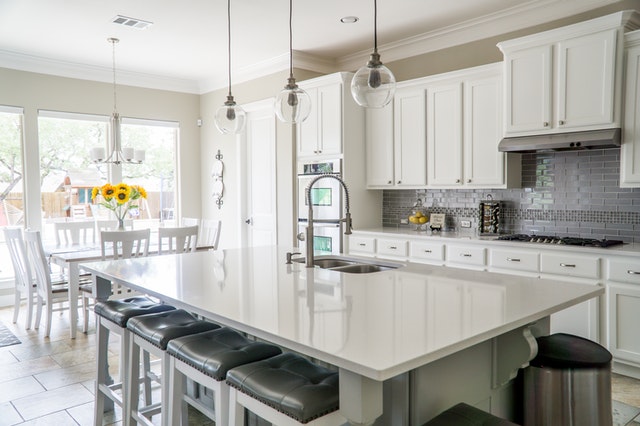
Tips to Declutter and Organize Before a Kitchen Remodel
A kitchen remodel can significantly disrupt your day-to-day life. So, before you start dreaming about improving your kitchen with the perfect kitchen color palette, it makes sense to declutter and organize before a kitchen remodel.
Making this kind of effort before the remodel will allow you to approach the renovation in carefully planned out stepsYou will be able to dismantle everything before the construction work starts, but also organize everything perfectly after the kitchen renovation. So, let’s take a look at a few organizational tips to make your kitchen declutter as effective as possible
Remove the kitchen utensils first
A good kitchen declutter may start from the kitchen cabinets and drawers. Interestingly, people usually associate decluttering their home with paring down their clothing or family belongings. As a result, kitchen utensils and appliances tend to pile up without you even noticing. This happens mostly because they seem less expendable than for instance clothes or toys.
However, just think about the number of old or useless appliances you keep stacking up in your kitchen cabinets. There is really no need to keep holding on to your old bread toaster when you have bought a new one.

Throw away anything you have not used in a while.
The same goes for kitchen utensils and silverware. Yes, they are an essential part of your household, but you just might have too many to ever find use for. And now is the time to figure out what stays and what goes out. What should you do with those items? Organize a yard sale or a charity giveaway for the items you decide are just superfluous.
Declutter and organize all kitchen items separately into labeled boxes
Once you finish the decluttering of the kitchen utensils and appliances, organizing them and packing them into boxes should be a breeze. So, instead of throwing everything into a single box, it makes more sense to have smaller boxes with appropriate labels.
Hence, designate a single box for pans, another one (with three or four compartments) for utensils, a third one for your mixer.
At this point this might seem unnecessarily complicated, but you will be thankful to yourself in the end. This kind of organization allows you to find anything you may need while your kitchen is being remodeled. In addition, you will be able to just pull everything out of a box and restore everything to its designated spot after you finish the renovations. Nothing mixed up or lost – less stress for you.

With proper organization, you will be able to use your kitchen right after the remodel.
During the home renovations, you may even rent a storage unit if you do not have enough space to keep the boxes in your kitchen or your home. In this case, a short-term solution might be good since you will be able to free up the kitchen and let the workers do their job without any obstructions or distractions.
As for family silverware and other items you might attach certain emotions or memories to, you can pack them securely in an air-sealed box to avoid exposing them to moisture or mold.
Make categories for similar items
Just as with kitchen utensils and appliances, it helps to have clear-cut categories for other items that you keep in your kitchen. For instance, you may have a cereal box or spices category, or one for canned foods and sauces.
Of course, you may not have to do this if you have a well-organized pantry or a kitchen island. However, decluttering and recategorizing your foodstuff before a kitchen remodel can be extremely helpful. There are simply no more excuses not to throw away expired food that has been laying in the back of the drawers for ages.
Also, you may decide to temporarily store your kitchen items in a storage unit. This is something many homeowners make use of when they are remodeling their kitchen. If you decide to do the same, take note that some things shouldn’t stay there for more than a few days or weeks. So, some foods should not be kept in a storage unit since they may rot. Since you surely want to avoid having to clean or pay damages to the storage service provider, make sure you know what you can and cannot store in a storage unit.
Designate one box for frequently used items
So far we have mainly discussed how to declutter and organize before a kitchen remodel by focusing on the phases before and after the remodel. However, what if you plan to stay in your home during the renovations?
Essentially, it helps to have a single box for items that you use on a daily basis. Rummaging through boxes to find your vegetable peeler might destroy all of your previous efforts to declutter and organize your kitchen. When you have such a box or cabinet, you will know where to find what you need immediately. This will save you a lot of trouble since it eliminates the need to surround yourself with boxes.
You will probably need many items from your kitchen, but you might not be able to enter the kitchen while it is being renovated. That is why it makes sense to pull everything out of the cabinets and other storage spaces.
Empty the kitchen cabinets completely to make things easier for you during and after the remodel.
Also keep in mind that your appliances or items might get damaged if they remain in the kitchen during the remodel. So, if you drink coffee on a daily basis, you should place the coffee maker in your living room.
All in all, we hope this short guide will be helpful when you start to declutter and organize before a kitchen remodel. We strongly suggest you take the time to do so since it will make organizing your newly renovated kitchen much quicker and enjoyable.
3 Furnace Installation & Repair Tips for More Attractive Home
Every homeowner craves for that beautiful-looking home. And this is why most people undertake home improvement projects. This may involve installing a new furnace, painting, updating lighting fixtures, and more. The furnace is one of the essential accessories for all homeowners and comes in handy in winter. If you’re seeking to repair or install a new furnace, there are various things to know.
Check out furnace repair and installation tips for a better-looking home:
Prepare adequately
It’s easy to call a technician when you have issues with your furnace. But, have you ever thought of preparing for repair or installation services? Well, this saves time and may save you a lot of money. For instance, if your furnace runs at the wrong temperatures, you may need to replace the thermostat.
To understand the cause of the issue, go through the user manual, and acquire the necessary parts. Learn of the essential components of a conventional furnace and, if possible, have some spare parts at home. Once done, contact the Air Makers furnace repair team for a quote.
Your choice of repair company matters!
There are different furnace installation and repair firms. All offer various services, and it’s best to find one that suits your needs. Look for professionals extending a wide range of services and furnaces. If seeking to install a new furnace, engage a company with a wide variety. This makes it to choose what you need and get something to match your budget.
Also, the experience and reputation of the company is of the essence. Hire one that has been in existence for a long duration; this is why most homeowners hire furnace repair Toronto services. The firm has received good reviews from former clients and has a vast team of technicians.
Think of the cost
If installing a new furnace as part of your home improvement project, know that the success of the upgrades relies on your budget. Therefore consider the costs and do your math carefully. There are different units, and it’s best to go for one that you can afford. In case of repairs, acquire high-quality parts to ensure durability and saves on repair costs.
Also, be keen on furnace repair companies that charge hidden costs. Get quotes and compare this among different service providers. Get to know all the pricing details before engaging the team. Additionally, seek a company offering follow-up services; this saves a lot in case things go wrong.
What are the common furnace issues that require fixing?
Multiple signs may indicate a faulty furnace. For instance, there may be low airflow from your systemsignifying issues with your motor or blower. Strange smells are also common. These indicate a dirty filter or a failing burner.
The burner may also not ignite properly, which may be a sign of a broken thermostat. Other issues include strange noise and the furnace running when it shouldn’t, and all require furnace repair services.
Final thoughts
Furnaces are great additions to any home. A furnace will not only enhance the look of your home but will also raise its value. To install or repair the old one, only engage professionals and endure that the company is licensed. Also, avoid cheap parts, and purchase superior components to lower t cost of repairs.
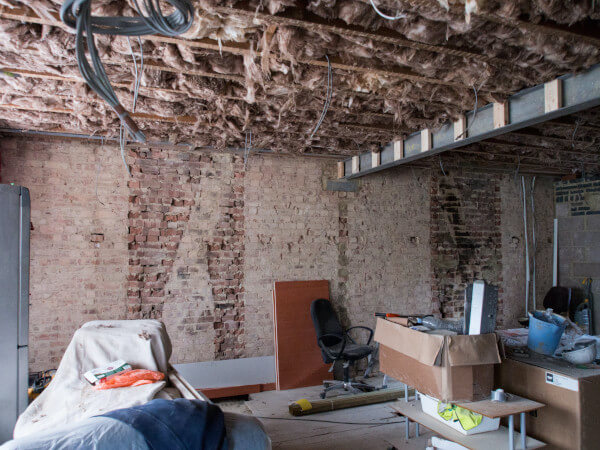
5 Things to Know Before You Begin a Property Renovation Project

Change is an inevitable part of all aspects of life- and our home lives are no exception. As we spend so much of our time in our homes (even more so due to the ongoing pandemic), it’s no wonder we look for change in terms of interior design and in the structure of our properties. From lifestyle changes- such as starting a family which requires interior change and perhaps change to the exterior, to modernising a home, a new theme or style- home renovations are something all homeowners will do at least once in their life. Renovating your property can be a challenging experience, however the transformational change to your home can be rewarding. Each property renovation task you undertake will bring new challenges and unexpected twists, and there are plenty of tips and tricks that can help if you find yourself in a sticky home renovation situation. Additionally, home renovations are a great way to add value to the cost of your property, as it enables you to adjust your home to the property market, therefore making it more desirable while adding value onto the property. If you’re wondering “how can I sell my house fast?”, then home renovations are a perfect place to start. But before you begin, here at We Buy Any House have compiled a list of things you should know before you begin a property renovation project.
Start With a Building Survey:
Before renovating any part of your property- you should commission a chartered building surveyor. This is especially important if you are planning on doing any structural renovations, such as building an extension or doing a loft conversion. The price of a surveyor typically ranges from £500 to over £1,000, depending on the age, size and location of the house. However, they will highlight important issues such as problems with the roofing, damp or any structural movement- which can cause major damage if not assessed properly.
Budgets and Quotes:
We all love to indulge in home-makeover TV shows- however they aren’t the greatest advisor when it comes to renovating your own home in terms of budget and expenses. It’s important that you don’t underestimate the cost of your renovation project, as this may result in you taking loans from the bank and ending up in financial hardship. Instead, before your project commences, sit down with your family/partner and work out how much things will cost- down to the last little details. Then, put some extra money aside in case anything goes wrong as an emergency fund.
Another thing to do is ask for an accurate estimate. Don’t trust the valuation of one person, seek several experts in that field and get an average estimate of the cost for specific jobs. Additionally, don’t rely on a ‘textimate’ (over the phone estimate). Encourage the person to come and view your property in person, so they can see what they’re dealing with firsthand.
Create a Realistic Timeline:
In an ideal world, all renovation projects would be done at the click of a finger. However, unfortunately, in reality this isn’t always the case. It’s important to have a sense of realism about home renovation projects and understand that even though you have probably been given a rough estimate by contractors, there may be factors which implicate this. Prepare for things to take longer than assumed and try to avoid feelings of frustration by envisioning the finalised result. A tip to get around this is to order your new updates before you have the existing materials removed, so that there’s no waiting time.
Expect the Unexpected:
Midway through your home renovation, there may be an unexpected occurrence. Whether it’s regarding uneven floors due to a shifted center joist, a roofing problem or problem with your water system, this can have a huge impact on the time scale of the project. The renovations will stop, and you will have to source a specialist who can repair that specific issue- and then renovations will resume when the site is safe and legally sound. This is just one reason why it’s better to allocate extra time and money into your renovation project- so you are protected from unanticipated mishaps along the way.
Be Specific:
Time is money and money is time. Your home renovation will probably not be cheap, so its best to have a clear plan before you give the green light. Although things may crop up along the way, there are certain things that should be concrete throughout the process (no pun intended!). Where you plan for things such as your radiators to be positioned, sockets and lighting layout should all be thought of well in advance. After all, it’s you that will be struggling to use your phone whilst its charging. The same goes for interior design. Don’t be swayed by a designer that thinks they know your style and taste and want free reign (unless you’re comfortable and happy with this). Instead, pre plan the interior of your home, and if it can’t be an exact match, get something close.
How to Upgrade Your Bedroom with Small Tweaks
Upgrading your bedroom is something of a dream. We all know how wonderful it feels to step into a freshly decorated space, featuring beautifully designed soft furnishings, elegant colour schemes and show stopping finishing touches. We have the perfect advice for you and your home, adding the building blocks to a complete, fresh, new interior style.
The smaller details really make a difference when upgrading your space. From switches to plug sockets you can combine contrasting yet complementing electrical features around your room to really add finesse. Often, we forget about upgrading our plug sockets and switches, underestimating the impact this has on your home, not only from a safety angle, but from an aesthetic perspective also. Our personal favourites are a smoked bronze or brass dimmer switch or toggle switch. For beautiful bedroom ambience, a dimmer switch is perfect for setting the evening tone.

Image Credit: Buster & Punch
For detailing around your headboard, introducing drop pendants either side of your bed to replace lamps and bedside tables is a perfect space saving technique whilst giving a luxe minimalist vibe throughout your bedroom. Controlling these each with separate dimmer switches allows you to create your own lighting either side of the room. Additionally, drop pendants make perfect reading lighting.
If the space in your room allows you to, you can create a coffee corner. This is a space featuring a beautiful bedroom chair and small table as an additional space to relax and unwind. Featuring a beautiful furniture piece in your room creates an eye-catching focal point to the room, adding character and definition. If your space is more neutral, you can introduce a pop of colour here as an elegant contrasting piece.
Let’s talk flooring. Flooring can transform your space entirely, and although it may not be considered a ‘small tweak’ it shows how something so simple can have a huge impact on the look and feel of a room. We absolutely adore a soft carpet in your comfort spaces such as a snug, office, or living room, and bedroom, the warm comforting touch on the soles of your feet is enough to bring anybody pure comfort. In a hallway and kitchen our top favourites are a herringbone style hardwood flooring or a neutral tile. The beauty of this being the ease of use and cleaning whilst featuring a crisp and clean finish.
Lastly, your soft furnishings play a huge part in the design of your bedroom. More specifically here, your curtains and blinds. If you’re looking to keep the light out, consider a roman blind paired with thick, luxurious, lined curtains for added comfort. Nothing breaks a room up more and adds character better than beautifully designed curtains. For the more luxurious feel, consider a silver lined pleated curtain or other neutral metallic shades.
How to Choose Paint Colors for Your House

Are you ready to update your house? There are plenty of home improvements you can make, big or small, that are sure to leave an impact. If you’re looking to refresh your house with paint, the first thing you have to do is choose some potential colors. Easier said than done, right? Selecting a color palette for your home can seem like a daunting task because of the endless options out there.
Here’s the best process for choosing paint colors for your home.
Pick out a few color options. The first step in deciding which color(s) are suitable for your home is to choose a few different colors. It sounds silly, but this first step is crucial on the path to deciding which color is right for you. You’ll narrow down the options without completely settling on one particular color from the start. Then, consider the space you’re looking to paint — is it indoors or outdoors? What does the furniture look like? Is there a lot of natural light in the room? Are there any colors or color families you can’t stand? What colors make you happiest? The answers to these questions will point you in the right direction for the next steps.
Know a little color theory. Consider your reason for having your home painted. Is it to make your home look bigger? Perhaps it’s so your home can feel cozier. Whatever your reason for painting is, there’s a paint color to match your goal. Generally speaking, crisp whites can help open up a space, but these hues can also make a room feel cold and lifeless. On the other hand, warm colors can make any space in a home feel welcoming, while soothing cool pastels can make a space more relaxing. Think about the atmosphere you’re trying to create and let that inspire your color choices.
Test multiple paint swatches. Whether you’re painting indoors or outdoors, professional house painters in Ashland, MA, say it’s always a good idea to do a color swatch test before making the final decision. You can easily get a sample size of the color you’re considering from a local paint or hardware store. When you swatch, make sure to test the color in multiple areas, so you get a good idea of how the color looks in shadow versus how it looks in the light. Additionally, make sure to swatch a large enough space (about a one-foot by one-foot area will do), so you have a better idea of how the color will look when you commit.
Use an online color visualizer. Perhaps the most challenging part of choosing a color for the interior or exterior of your home is knowing what it will look like when the job is done. Color swatching can get you pretty far, but you still won’t know what the finished product will truly look like. Fortunately, there are a variety of free tools online that can help you picture any color in your space. All you have to do is upload photos of your room, choose the color you’re considering, and the visualizer will provide you with a picture of your revitalized space.
Decide on a paint finish. One of the last steps in choosing a paint color for your home is settling on the type of finish you want. Most paints are available in flat, matte, eggshell, satin, semi-gloss, or high-gloss. The space you’re having painted can help determine the finish you choose, as can your personal preferences. Homeowners often opt for a long-lasting finish like eggshell or satin in high-traffic areas because it is scrubbable and can withstand the test of time. If you’re unsure which finish is right for you, a painting professional can provide you with more information.
And if you’re still stuck on what color paint to choose for your home makeover, it might be time for a consultation. Professional painters and interior decorators can usually make color recommendations for any space in your home. Remember that you don’t always have to go with what’s on trend. Follow your gut and choose the colors that make you feel the most content.
3 Tips for Decluttering Your Home
There are many reasons a person might decide to declutter their belongings. Perhaps they have an upcoming move approaching, they’re downsizing to a space with less storage, or they might simply be dreaming of a living space with a lot less stuff. In any case, they need to cut down on the items around them, getting rid of things they don’t need and taking advantage of more effective storage options for those items they intend to keep.
As you embark on your decluttering journey, you may run into a wide range of obstacles and even more questions. For example, how should you handle the sheer number of items you have to sort through? Where can you find storage units near you? What should you do with the things you’re purging? Fortunately, a few particular tips can guide you through the decluttering process at home and beyond.
1. Find the right type of decluttering for you.
From Marie Kondo to The Home Edit, there’s no shortage of decluttering and organizing methods you can choose from, and each one has its legions of devoted followers who swear by their strategy of choice. However, your question shouldn’t be which method of organizing or decluttering is the most effective for most people. Instead, you should consider which option is the right fit for you.
Hot Mess House host Cas Aarssen utilizes this concept in her Clutterbug ideology, a set of four different organizing styles she’s seen in her clients. The same principle can be applied to decluttering. For example, should you sort through your items in large groupings, like the KonMari categories of clothes, books, papers, and so on, or will you have better results by categorizing your belongings further, such as decluttering tops, bottoms, dresses, and other subcategories within the larger umbrella of clothing? Once you’ve determined the most effective strategy for your unique needs and personality, the decluttering process will become much less overwhelming.
2. Figure out what to do with your existing belongings.

The belongings you keep and those you decide to discard will need to be dealt with beyond this initial declutter. For those things you plan to keep, what will you be doing with them? Ideally, you’d have delegated spaces within your home for everything you keep. However, your space doesn’t always work with your lifestyle. For instance, what if you’re embarking on RV life and are decluttering your belongings to fit in that small space, but you don’t want to lose their cherished heirlooms or other non-urgent items just because they’re not in the RV with you? In these cases, a storage facility may very well be your best bet. Just be sure to organize your storage unit to make sure your items are indeed organized and decluttered.
3. Find ways to dispose of the excess.

There are other items that you won’t want to keep. It’s easy to toss out blatant trash, but other types of belongings might prove more difficult. Can that box be recycled? Where might you donate those old clothes? What should you do with that entire extra pile? Take some time to research how you should dispose of those items you’ve decluttered to ensure you’re doing so responsibly. Donations, trash, and even gifts can get unnecessary items out of your home or storage space and to a more appropriate destination.
When you stare at a pile of clutter, the sheer thought of purging and organizing can become intimidating. However, you can and will get through these items successfully. Simply spend some time considering the methods and minds that will work best for you, store your “keep” pile in an organized manner, and dispose of the decluttered excess responsibly. Then, enjoy your newfound extra space!
Process of pool installation, Step wise

The following is a step-by-step guide on installing your swimming pool, from start to finish. When you meet with one of our designers for a free consultation and estimate, they may go through each stage in further detail.
Design
The pool designer will then take the information you provided and create a drawing of the pool in the area you specified on your property.
Layout & Excavation
This is the first step in the construction of your salt water pool The layout as well as the excavation are completed on the same day. The construction manager and excavation crew will meet with you to plan the pool’s layout. They will begin excavating the pool after you have approved the location and elevation of the pool. This day will be used to remove any surplus soil that cannot be graded into the yard.
They will simply remove soil from the yard at this time. The location of your filter equipment and light junction boxes will also be confirmed by the construction superintendent. If you haven’t finalised your coping and tile choices yet, you’ll need to do so now to avoid any delays in construction process. This is the day that your excavation instalment is due.
Steel Reinforcing
This is where your pool’s support structure is built. Our gunite shell gains structural strength from the steel setting. Once the steel is installed, the township will be contacted for a building inspection and a partial bonding inspection.
Gunite
It is at this point that the pool’s shell is constructed. For this part of the project, we’ll need to use your outdoor water supply. You may be required to stay for a few moments to approve the placement of any benches and your steps. This is also when the gunite instalment is due.
Plumbing
The pool plumbing and filter equipment will be installed and pressure tested on this day. This step does not require your presence because the equipment and light junction boxes were installed during the layout and excavation. If an electrician and a gas plumber are required, you are now ready.
Coping and Tile
It is now that you will see that your saltwater pool is getting finished. Your raised wall’s coping and tiling, as well as, if necessary, the facestone, will be installed. You do not require to be present for this stage once again.
Electric and Gas
The electric and gas lines must be connected after the pool filter equipment has been installed.
Decking
The decking installation can be planned after the electric and gas connections have been examined.
If you hire your own decking contractor, it is your decking contractor’s job to ensure that the decking is not completed until all necessary inspections have been conducted, such as gas and electric trenches, and bonding. It is also your concern that the installed decking does not surpass or impact on any township setbacks or limits and that the amount of decking does not exceed any lot covering totals. Backfilling any ditches that may be in the way of installing the deck is the responsibility of whoever is performing the decking.
It’s also crucial that the decking system, concrete, or pavers have adequate expansion, with at least a 12″ x 4″ ethafoam expansion connection between the deck and the pool coping and shell. If you don’t get this installed, you risk damaging your pool’s coping, tile, and gunite shell, which won’t be covered under warranty.
Fencing
After the decking is finished, the fencing around your saltwater pool should be built. They can’t start filling your pool until the permanent fence is in place due to local building laws. They request that one portion of the fence be removed so that They can access the saltwater pool to plaster it.
Plastering
This is the right time to start planning your pool party. This is the last step in the saltwater pool construction process. We leave the pool to fill with your water supply after the plaster is done. DO NOT end the water from filling the pool during the filling phase. Where the water was turned off, a stain or ring may appear on the pool plaster surface. Stop filling the pool after the water reaches the centre of the tile and call the office to schedule the start-up. This is the moment to pay for the plaster.
Making a Small, Outdated Bathroom Look Fabulous
When you have a master bathroom that’s anything but, and you’re working with a limited budget, it’s time for a small bathroom remodel.
The post Making a Small, Outdated Bathroom Look Fabulous appeared first on Today’s Homeowner.
Did you miss our previous article…
https://www.passivehouseca.org/?p=287
DIY Upholstery Tips for Beginners

Have you got some beloved furniture that you just can’t bring yourself to throw away? Whether it’s an old chair that needs a new seat, or you’d like to give a piece of furniture a bit of a revamp, having a go at DIY upholstery could be your best bet.
However, if you’re new to the upholstery world you might not know where to begin. This article will go over some of the top tips for DIY upholstery to help you make a start on your new project. From which upholstery nails to choose from to checking the inside of your furniture, here’s everything you need to know about upholstery before you start.
Get your tools right:
The first tip may be one of the most important, as without the right tools, there’s no way you could do a decent job! Having the correct tools will not only make your life easier, but the finished product will also thank you for it. Your final results will go from amateur-looking to professional level! Here are the most important tools to get right:
Upholstery gun: There are three different types of upholstery guns, the most popular being the pneumatic staple gun. This type will make the job much easier and quicker, so don’t just go for the cheapest option, as you might regret it!Upholstery nails: You can choose from a range of upholstery nails to add a final touch to your product. Not only can these disguise any staples on show, but they can be used as decoration to give the furniture a certain look or style. You’ll need a hammer for this!Fabric scissors: Good quality fabric scissors are essential for getting straight lines and avoiding tearing to the fabric.Marker: You can use anything from chalk to a pencil to mark where you want to cut the fabric, this will help you make more accurate measurements.Staple remover: For all beginners, you’re bound to make a couple of mistakes. Having a staple remover on hand will allow you to fix those errors swiftly.
Don’t forget the inside
When you first start upholstering, you only want to focus on updating the outside. With this in mind, you need to check to make sure the insides are in good condition. If not, this will be a job for a professional.
You can check the insides are working correctly by testing how sturdy and solid it feels when you sit on the furniture piece. If it feels rock hard or you sink deep into the seat, these are signs that there are a few problems that need fixing and you should leave that piece to someone who knows what they’re doing!
Be picky with fabrics
You don’t want to put loads of effort into upholstering a piece of furniture for the fabric to only last a couple of months (or to rip whilst you’re working on it!). If you choose a fabric that won’t tear easily and is heavy-duty to withstand years of rubbing, you could give the chair or sofa a new lease of life for years to come.
Thin fabrics might be cheap, but you’ll just have to re-do the covering not long after! Heavy hemp fabrics and cotton twill or denim are all good choices for long-lasting upholstery.
Start small
It’s great to be optimistic, but if it’s your first time trying to reupholster a piece of furniture, it’s probably not the best idea to start with something expensive, large, or pieces that are important to you. It’s best to get your practice in first until you feel confident enough to tackle larger projects.
You don’t want to start with a large piece of furniture as this might be so difficult that it puts you off upholstering for a long time. Have a go with something small like a footstool as your first attempt to get yourself comfortable with the process. Buying something cheap will also put the pressure off getting it right first time, that way you can have more fun with it and any mistakes won’t be a big deal.
Practice makes perfect!
As with anything, skills take time to develop and the more time you give to it, the better you will get. Follow these top tips when tackling your first upholstery project and you should feel confident enough to make a start.